Background
I wanted to learn about Docker. But I don’t want to keep Docker running on my daily drive machine. It happens that I have an old Raspberry Pi 1 Model B+, which I have bought a long time ago, that just sits there doing nothing. So I decided to make it work for me.
The setup
Here’s my plan:
- Install Raspberry Pi OS (previously called Raspbian) on my Raspberry Pi
- Install Docker
- Run Hello World Container
- Remove Docker Image
Step 2 – Install Docker
Yes. I’m skipping step 1 here because there is a very detailed setup guide on Raspberry Pi’s website already. I want to focus on the installation of Docker, so I’m not going to repeat it here.
I have followed a few blog posts. Here are the most optimized steps that I found:
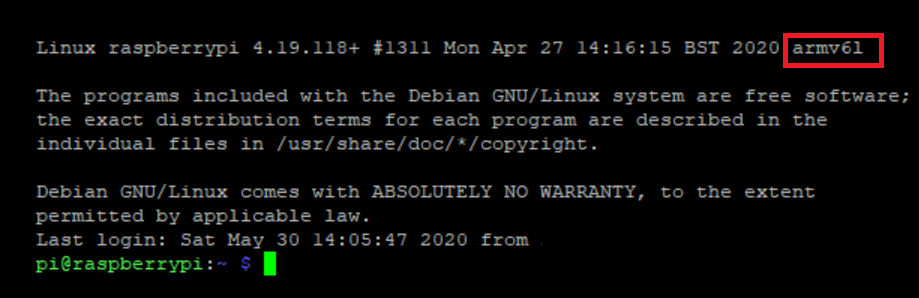
0. Login to your Raspberry Pi OS either directly log in through the terminal or remotely login by SSH. Then you should be on this screen:
1. Update and upgrade your apt-get package tool
sudo apt-get update && sudo apt-get upgrade2. Download Docker installation script
curl -fsSL https://get.docker.com -o get-docker.sh3. Execute the installation script
After the download step above. Check that the script is actually downloaded to your machine:
ls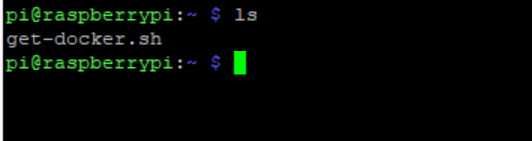
Okay, now we can execute the installation script as root user:
sudo sh get-docker.shDepending on your internet speed, this step will take a few minutes. Sometimes you would think that your Raspberry Pi is frozen. But give it a good couple of minutes. If it runs successfully, you should see the following on your screen:
4. Add a non-root user to the Docker group
sudo usermod -aG docker [your-user]This step is to add a user to the Docker user group. If you don’t follow this step, you’ll have to run the docker command as a root user. That means you have to type “sudo” every time you run the docker command. Note that you have to replace [your-user] with your actual user name in the command. For example, my user is pi:
sudo usermod -aG docker piThe “-a” flag is to add anyone of the group to a supplementary group. In this case, the docker group. We should only use it with the -G option. The “-G” flag is to add a supplementary group. Note that “-G” is case sensitive.
When using the “-G” flag alone, if the user is currently a member of a group that is not listed, the user will be removed from the group. This behavior can be changed via the “-a” option, which appends the user to the current supplementary group list.
5. Check your Docker version
The purpose of this step is not just checking your docker version. It also see if your user is actually successfully added to the docker group. If it works, you shouldn’t need to run the docker command as root. i.e. “sudo”
docker version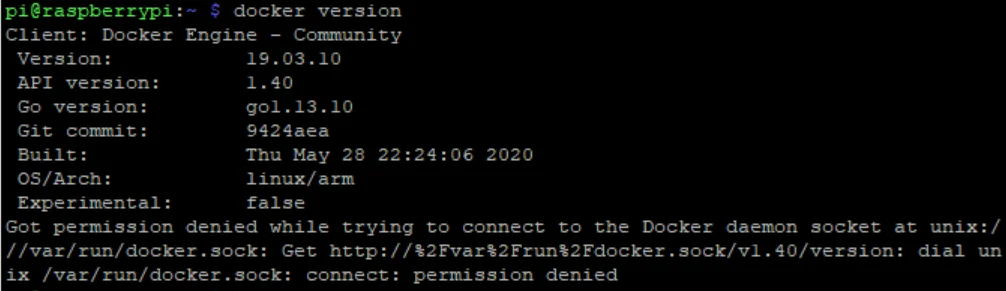
If you see a “permission denied” message like I did, do NOT run “sudo chmod 666 /var/run/docker.sock”. This command will give read and write permission to the docker.sock file to every user in the system. As Dave H has mentioned, it will cause a security risk.
Run the following command instead:
sudo chown $USER /var/run/docker.sockThe above command changes the ownership of the docker.sock file to your user. If you run the “docker version” command now, the “permission denied” message should be gone.
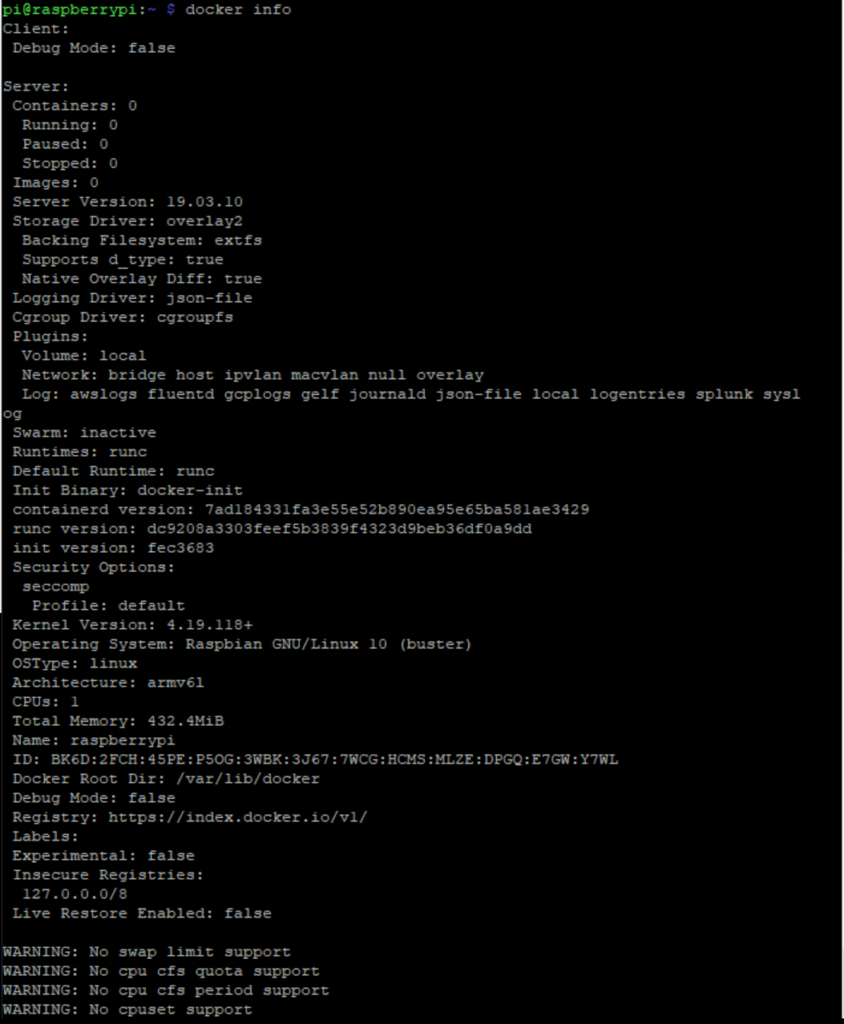
Now run the following command:
docker infoand here’s my screenshot:
3. Run Docker Hello World container
If you have a Raspberry Pi 2 or newer, you should be able to run the following command for hello-world without any issue.
docker run hello-worldBut for older Raspberry Pi, it doesn’t work anymore. My Raspberry Pi 1 Model B+ for example, doesn’t print the hello-world message like when you run hello-world in other systems. You can check the status of the current docker containers using the following command:
docker ps -a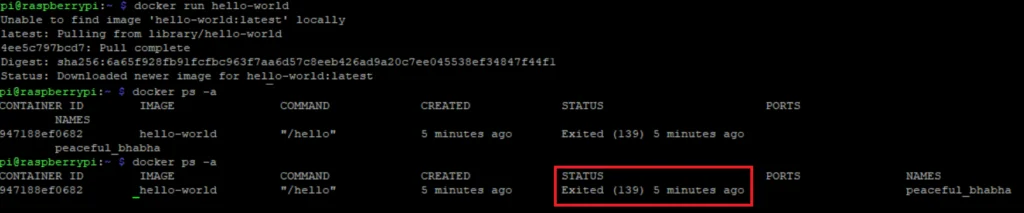
You’ll see that the hello-world container is excited with code 139. It means the container received a segmentation fault.
After some digging on the internet. I realized that it is not the problem of my installation.
Remember in step 0 when you logged in? The message “armv6l” (the letter after the character “6” is not the number one, it’s the letter “L”) actually indicates the instruction set architecture of this particular model of Raspberry Pi. Although the regular hello-world image works in most cases, somehow the latest version of the hello-world either doesn’t support the armv6 instruction set anymore.
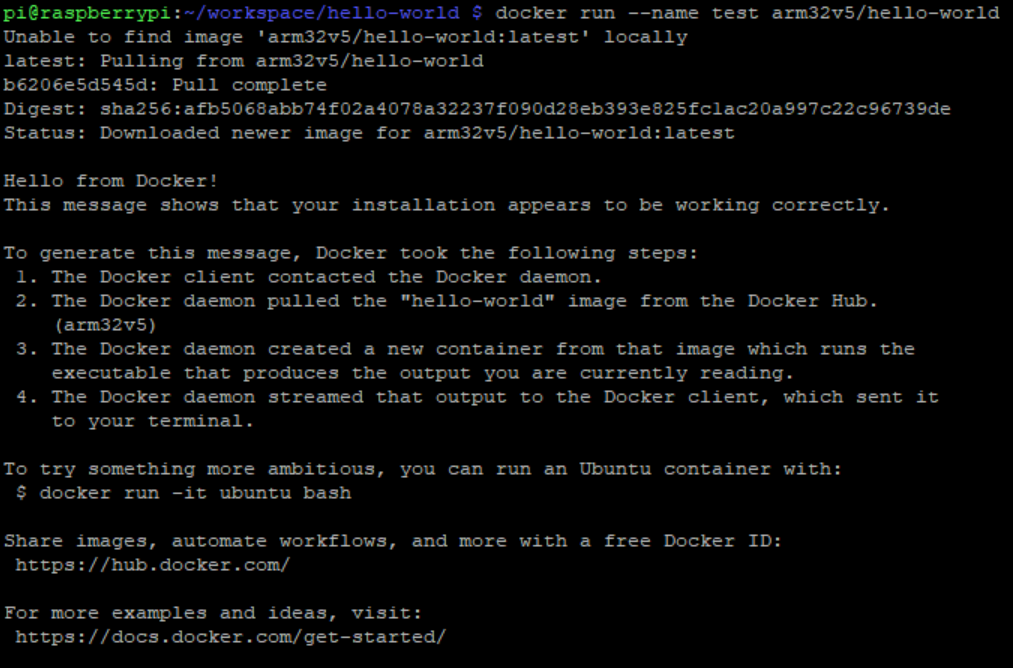
To run any docker image on Raspberry Pi OS, the image have to be built on the same architecture. Here’s the version of Hello World Docker image that works:
docker run --name [myHelloWorld] arm32v5/hello-world[myHelloWorld] is an arbitrary name that you can give to a container. I’ve named mine as “test”. So mine was:
docker run --name test arm32v5/hello-worldNow you will see a normal Hello World message as the following:
There you go! Now you have successfully get Docker running on your old Raspberry Pi 1 Model B+!
4. Remove Docker Image
To remove a Docker image, you have to first remove the docker container. First, list all the Docker containers:
docker ps -aYou should see a list of Docker containers that have been run. Here’s one way to remove a container. To remove the Hello World container above, for example, you can run:
docker rm testNow if you run docker ps -a again, the list will be empty.
Then, let’s list the available docker images:
docker image lsYou should see the arm32v5/hello-world image. Let’s remove it:
docker image rm arm32v5/hello-worldI’ve also created a Hello World from my Raspberry Pi. Feel free to try it out.
docker image rm lokarithm/armv6-hello-worldAdditional Note
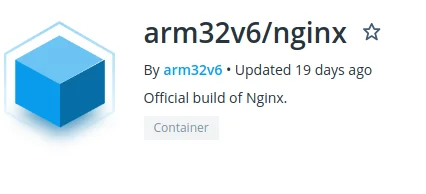
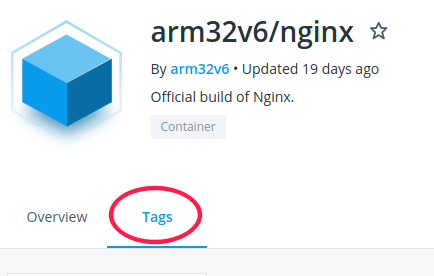
As you may have noticed, you can only run Docker images with armv6 instruction sets(or below) on Raspberry Pi 1 and Pi Zero. To find out whether an image support armv6, you can go to Dock Hub to find the image. For example, I want to run an image of Nginx. I would scroll down to the quick reference section:
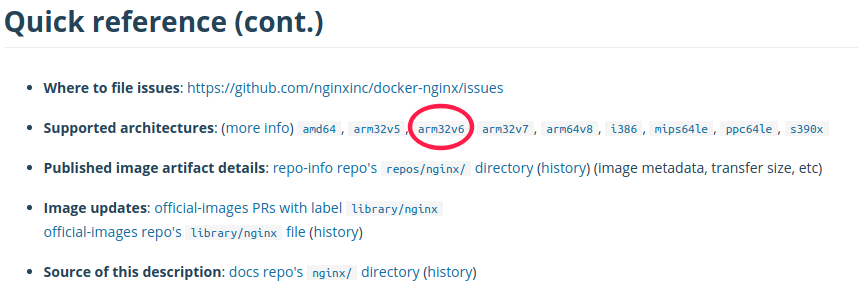
From there, if you see “arm32v6” then click on the link. That means you can pull that image and use it on your Raspberry Pi 1 or Zero.
In the example of Nginx, you can download the image with the following command:
docker pull arm32v6/nginx:stable-alpineNote: Usually, if you don’t specify the version of the image, Docker will pull the latest version with a tag called “latest”. But in this case, the latest version is tagged as “stable-alpine” instead. I found the correct version by clicking the tags tab on the page. It should work if you use the same version.
And then run it:
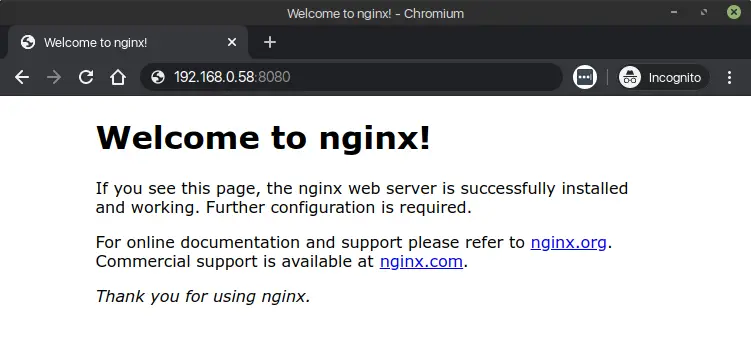
docker run -p 8080:80 arm32v6/nginx:stable-alpine
The -p flag simply map port 8080 of the host to port 80 of the image. Now you should be able to browse the default Nginx homepage. If you’re running the command directly from the pi, simply open http://lokarithm.com:8080. If you’re like me, who SSH into the pi. You can simply use the same local IP address of your Pi to browse the site. In my case http://192.168.0.58:8080/
It’s that simple. Happy Docker-ing!
Feel free to leave me a message if you have any question.
If my note helped, please consider buying me a coffee😁.
Cheers,
Lok
Side note: I started this post using Putty on Windows 10 to SSH into my Raspberry Pi at the beginning. After a few weeks, I’ve switched to Linux and used Remmina for SSH. So the styling of my screenshots has changed a little.
Leave a Reply